
GitHub 部署 hugo 博客
hugo 项目地址:https://github.com/gohugoio/hugo
hugo 主题:https://themes.gohugo.io/
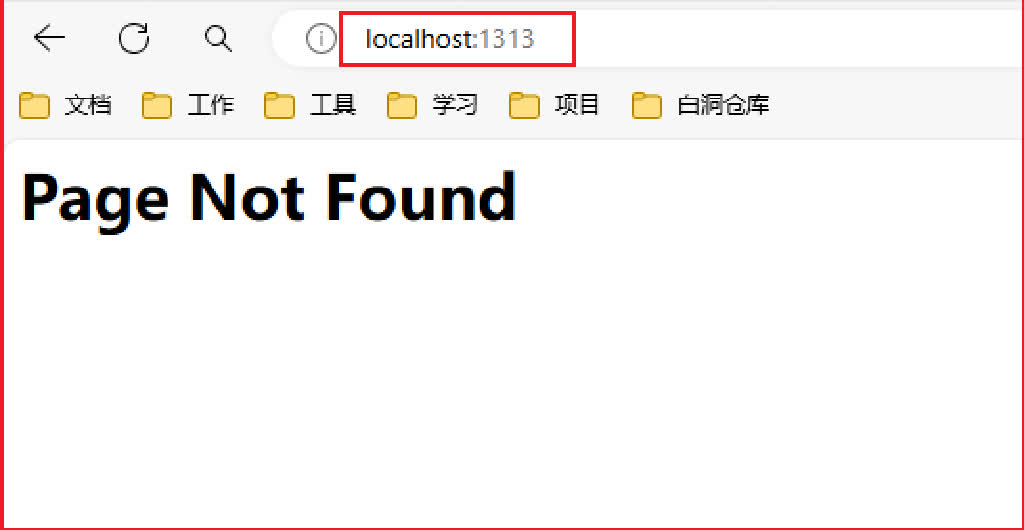
hugo 本地地址:https://localhost:1313
我的 hugo GitHub地址:https://meimolihan.github.io/
一 、windows 安装 hugo
1 、安装 scoop
- Scoop是一款适用于Windows系统的命令行包管理工具。
- 在以管理员身份运行的
PowerShell中,运行以下命令来启用管理员安装:
1 | $env:SCOOP_REPO = 'https://github.com/ScoopInstaller/Scoop' |
- 或者克隆仓库
1 | cd "$env:USERPROFILE\scoop\buckets\main" |
- 查看 scoop 版本
1 | scoop --version |
2 、安装 hugo
1 | scoop install hugo-extended |
- 查看 hugo 版本
1 | hugo version |

二 、创建站点
1 、电脑桌面创建 Hugo 目录
1 | mkdir %USERPROFILE%\Desktop\Hugo |
2 、进去 Hugo 目录,并创建 myblog 站点
1 | cd %USERPROFILE%\Desktop\Hugo && hugo new site myblog |
三 、安装主题
1 、克隆 stack 主题
1 | cd %USERPROFILE%\Desktop\Hugo\myblog\themes && git clone https://github.com/CaiJimmy/hugo-theme-stack stack |
- 克隆成功后,删除
%USERPROFILE%\Desktop\Hugo\myblog\themes\stack\.git文件 - 日后 git 推送 hugo 会有影响
2 、拷贝配置文件
- 拷贝 hugo.toml 文件
1 | copy %USERPROFILE%\Desktop\Hugo\myblog\themes\stack\exampleSite\hugo.yaml %USERPROFILE%\Desktop\Hugo\myblog\ && del %USERPROFILE%\Desktop\Hugo\myblog\hugo.toml |
- 拷贝 content 文件夹
1 | copy %USERPROFILE%\Desktop\Hugo\myblog\themes\stack\exampleSite\content %USERPROFILE%\Desktop\Hugo\myblog\content && rd /s /q "%USERPROFILE%\Desktop\Hugo\myblog\content\post\rich-content" |
3 、开启主题
- 编辑 hugo.yaml 配置文件
1 | theme: stack |
四 、新建文章
1 、修改文章模板
- 模板路径:%USERPROFILE%\Desktop\Hugo\myblog\archetypes\default.md
1 | --- |
2 、Hugo 新建文章
1 | cd %USERPROFILE%\Desktop\Hugo\myblog && hugo new "post\hugo 部署\index.md" |
3 、编辑文章
- 打开文章目录
- 编辑 Markdown 格式文章
1 | %USERPROFILE%\Desktop\Hugo\myblog\content\post |
4 、修改文章属性
- 在
C:\hugo\myblog\content\post目录找到新建的文章 - 修改文章,将草稿
draft = true修改为draft = false发布
5 、hugo 命令
- 生成静态并启动
1 | cd %USERPROFILE%\Desktop\Hugo\myblog && hugo server -D |
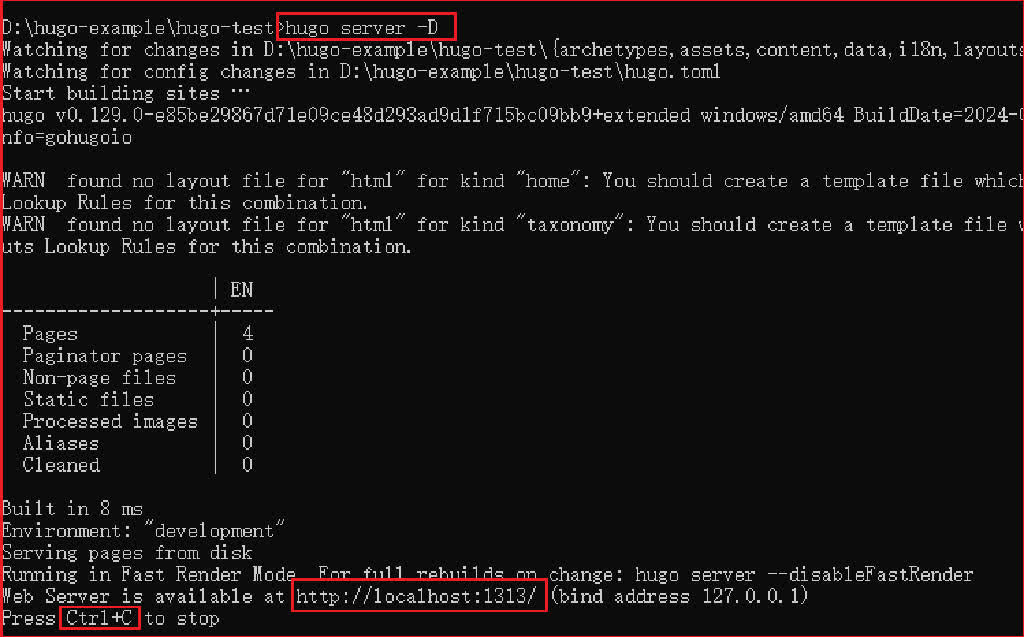
- 浏览器地址:http://localhost:1313/
- Ctrl+C停止服务 (hugo默认是没有主题的,需要进行主题配置)
五 、修改 hugo.yaml 配置文件
1 、修改默认语言
- 修改默认语言为:中文
1 | DefaultContentLanguage: zh-cn # 默认内容语言 |
2、网页标签页上显示的图标
1 | params: |
3、网站创建时间
1 | footer: |
4、时间格式
- 日期格式,必须是符合 Go 语言的日期格式
1 | dateFormat: |
5、博客头像配置
1 | sidebar: |
6、文章配置
1 | article: |
7、评论系统配置
1 | comments: |
8、右侧小部件配置
1 | widgets: |
9、主题默认颜色
1 | colorScheme: |
10、图片处理
1 | imageProcessing: |
11、社交信息
1 | menu: |
12、TOC 目录
1 | tableOfContents: |
13、代码围栏
1 | highlight: |
六 、部署在 GitHub
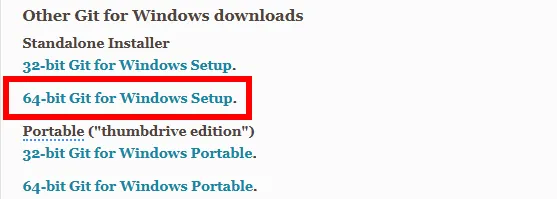
1 、安装 Git
- 前往【Git官网】,下载安装程序
- 一直点下一步,默认安装即可
2、Github 常规部署
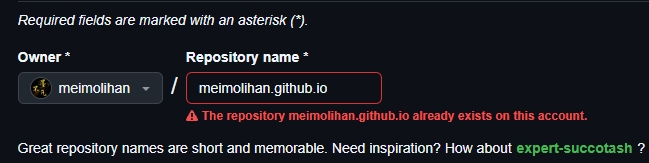
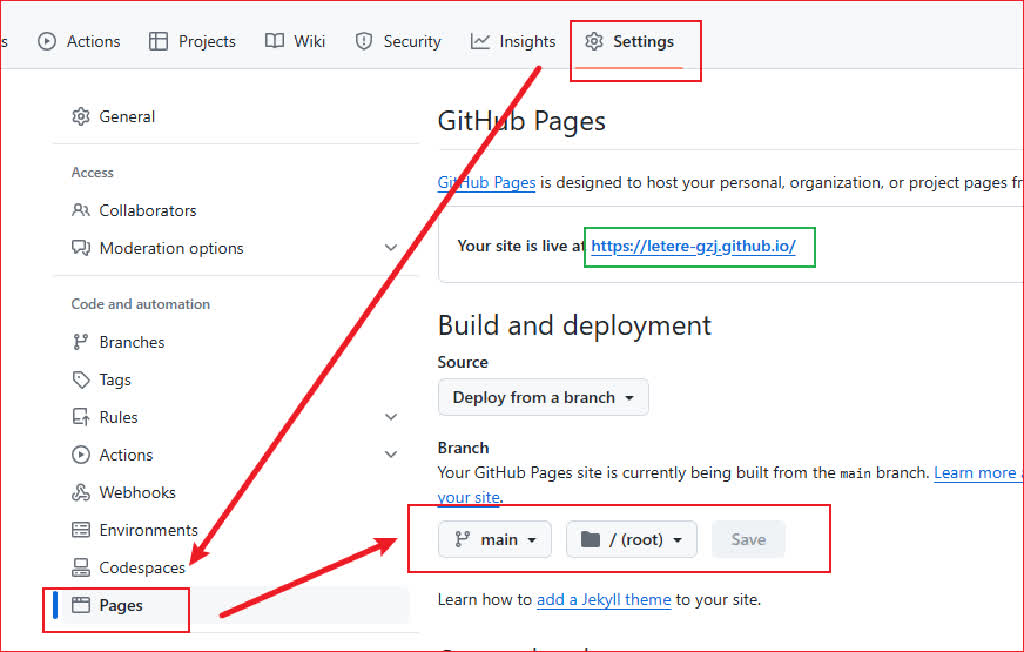
- (2.1)前往【Github官网】,创建仓库 {github用户名}.github.io
- (2.2)前往Setting -> Pages -> Branch选择main分支,然后保存,会自动开启 https://{github用户名}.github.io 的地址,这地址也是以后访问博客的地址
- (2.3)回到hugo文件中,执行命令hugo -D,会生成 public 静态资源文件夹
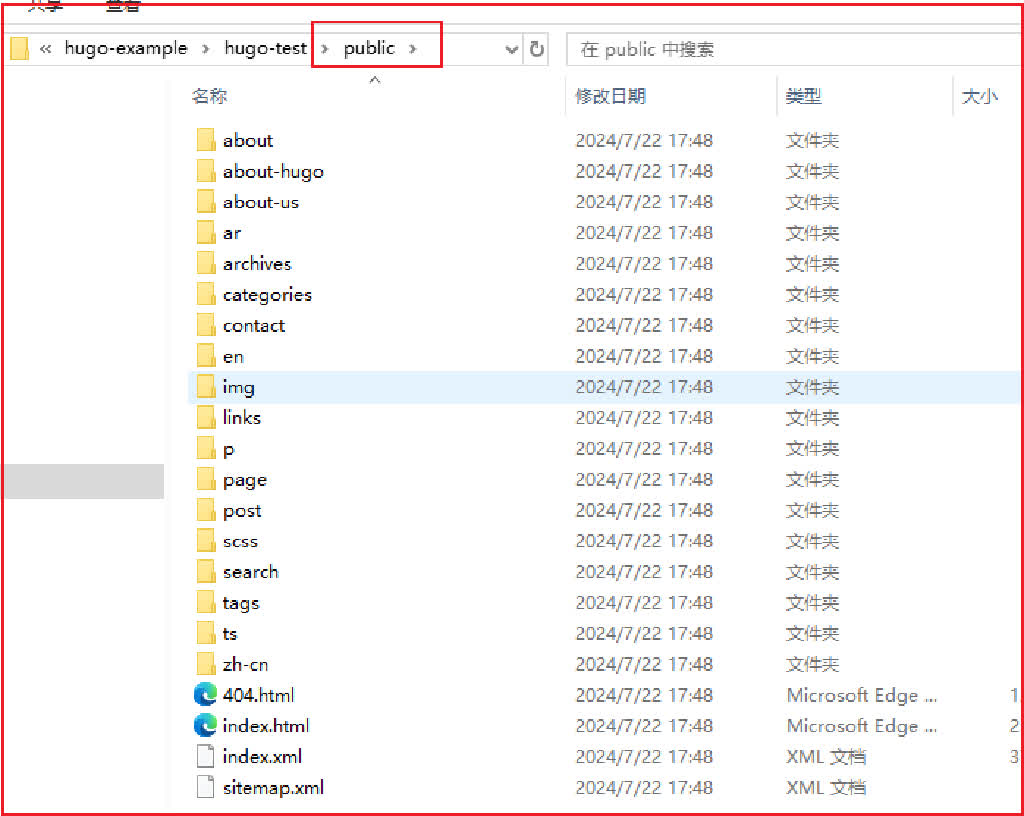
- (2.4)在 public 执行以下命令上传到github仓库上,第一次上传可能需要输入账号密码
1 | git init |
- (2.5)上传成功后访问 https://{github用户名}.github.io,成功搭建属于自己的Hugo博客
3 、 Github Action 自动部署
-
(3.1)Github创建一个新的仓库,用于存放Hugo的主文件
-
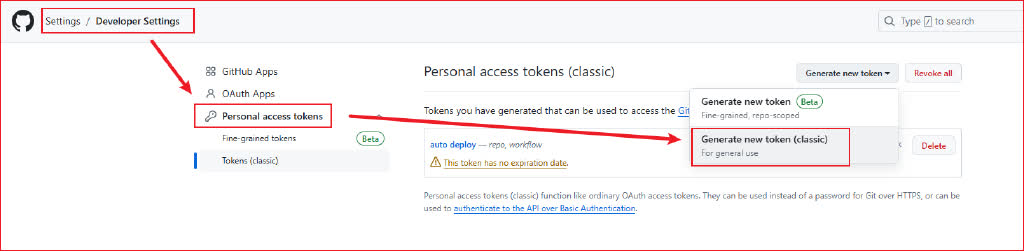
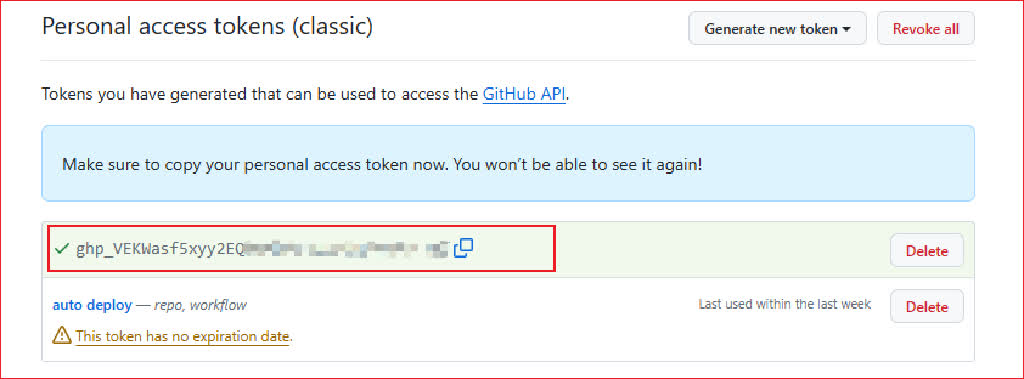
(3.2)前往Setttings -> Developer Settings -> Personal access tokens,创建一个token(classic)
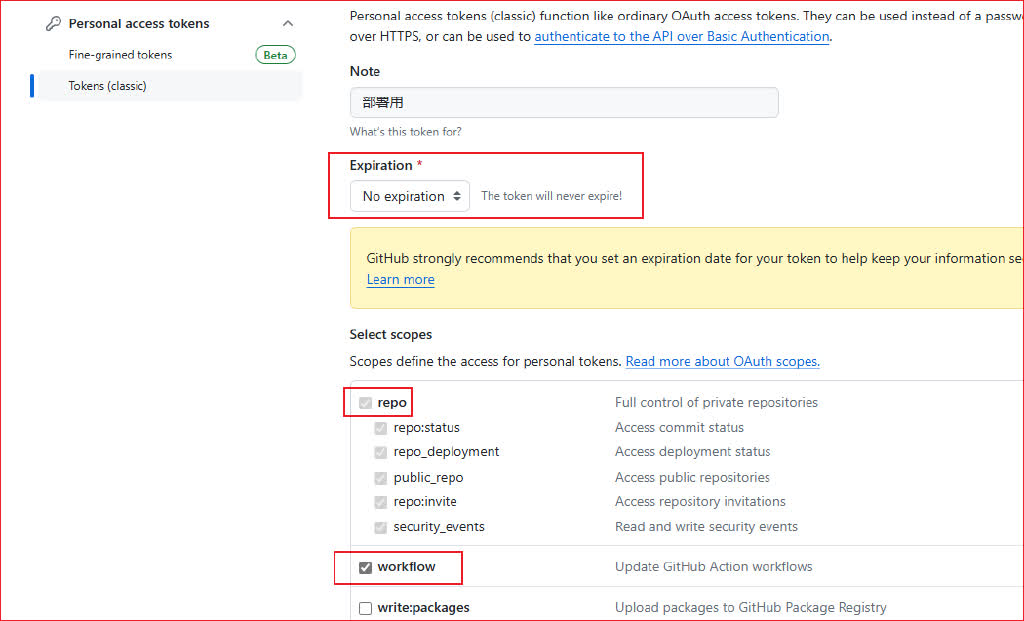
(3.3)token选择永不过期,并勾选 repo 和 workflow 选项
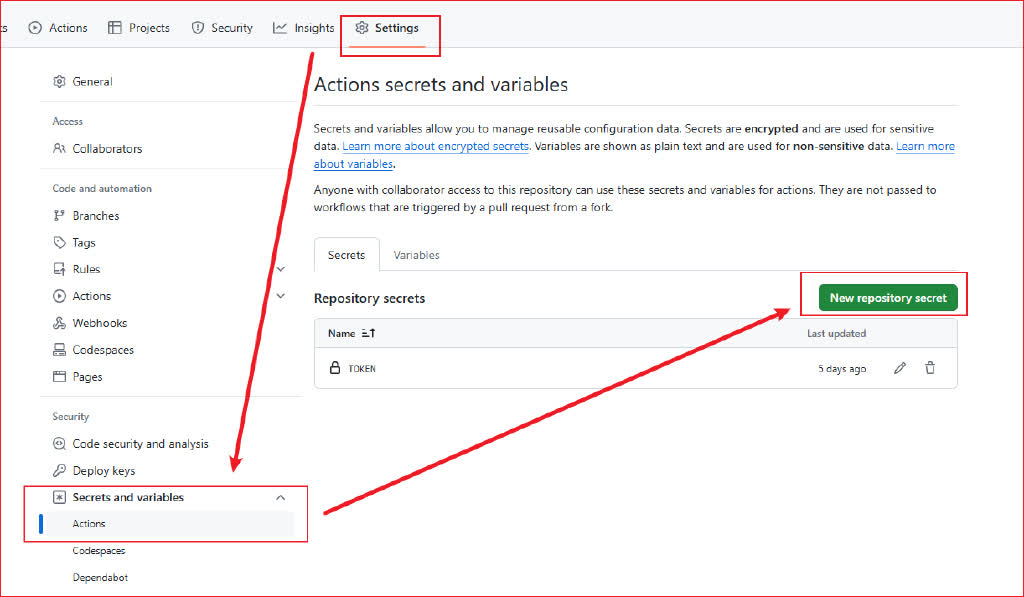
- (3.4)为保证安全,将生成的token,保存的仓库的变量中,前往
Settings -> Secrets and variables -> Actions中设置
- (3.5)在hugo主文件创建一个
.github/workflows/xxxx.yaml文件,将以下内容复制进去,想具体了解更多,可查看【Github Action文档】
1 | name: deploy |
- (3.6)在hugo主文件创建.gitignore文件,来避免提交不必要的文件
1 | ### 自动生成的文件 |
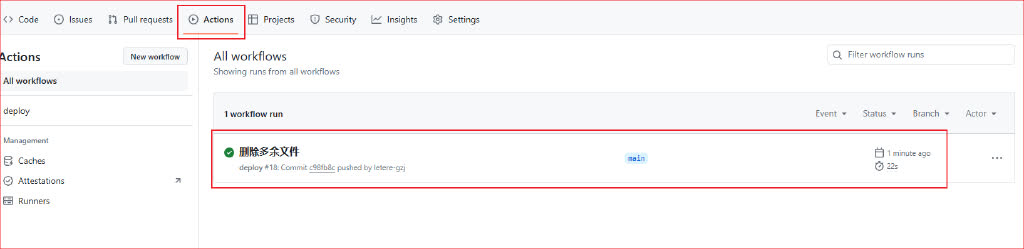
- (3.7)将hugo的主文件上传到仓库,上传成功后会触发Github Action,来自动部署你的静态页面
1 | git init |
4 、后期更新项目
1 | git add . |
相关推荐

评论